USB storage device |
| A USB storage device or USB memory can be used to synchronize one or more computers. This section explains how to use Sync Lab to synchronize a hard drive in a PC and a USB memory. Un dispositivo de almacenamiento USB o memoria USB puede ser usado para sincronizar una o más computadoras. Esta sección explica cómo usar Syng Lab para sincronizar un disco duro de una PC y una memoria USB. |
| Tip |
| Always set a name of a USB memory or a hard drive. To set the name of the storage device, use the context menu by making right click with the mouse to open the properties of the device, see figures below. Siempre fije un nombre a una memoria USB o a un disco duro. Para fijar el nombre del dispositivo de almacenamiento, use el menú de contexto haciendo clic derecho con el ratón para abrir las propiedades del dispositivo, vea las figuras de abajo. |
| Problem 1 |
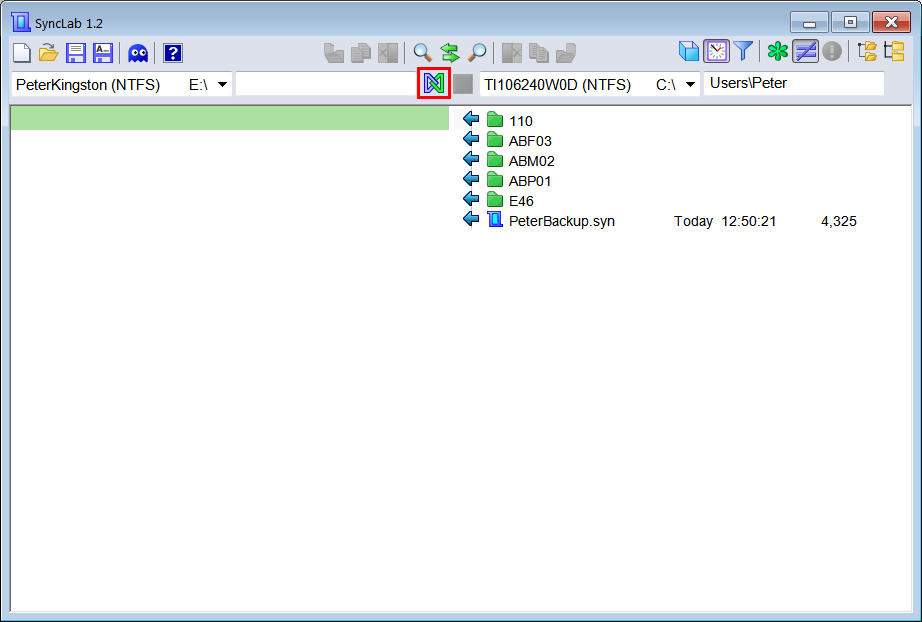
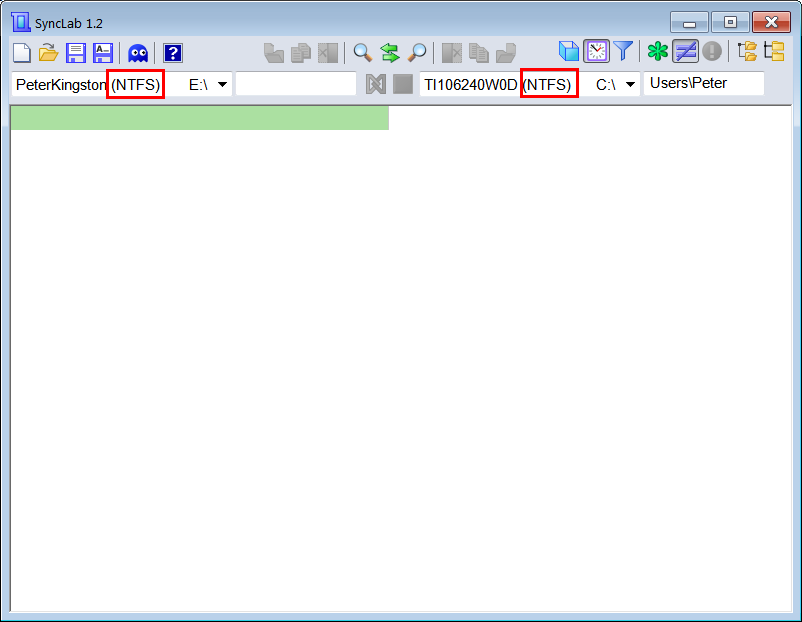
| Create a Sync Lab file to synchronize the C:\User\Peter folder (in your PC) and a USB drive called PeterKingston. The figure below shows these two locations. Cree un archivo de Sync Lab para sincronizar la carpeta C:\User\Peter (en su computadora) y una memoria USB llamada PeterKingston. La figura de abajo muestra estas dos ubicaciones. |
| Step A |
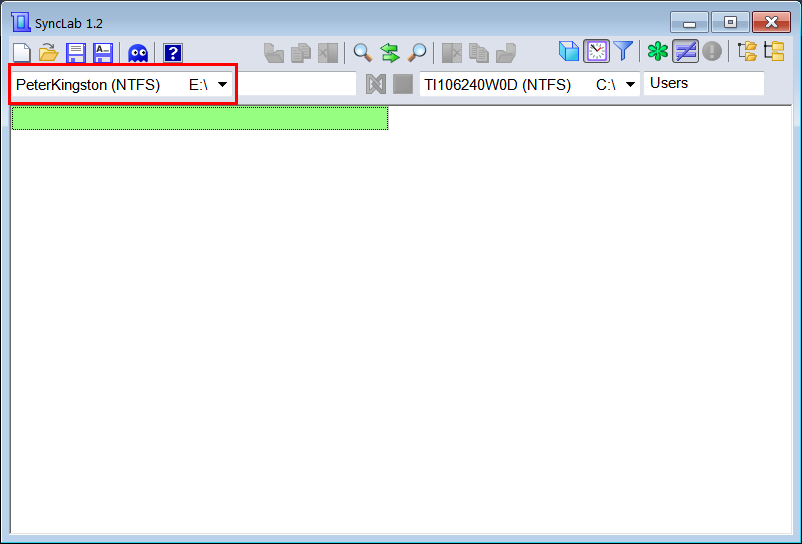
| Open Sync Lab and select the location of the left side by clicking on the drop down list on the left. When the drive does not have a name, the drive will be displayed in red. Set a name to the drive before proceeding. Abra Sync Lab y seleccione la ubicación en el lado de la izquierda haciendo clic en la lista desplegable de la izquierda. Cuando la unidad no tiene nombre, la unidad se mostrará en rojo. Fije el nombre de la unidad antes de proceder. |
| Tip |
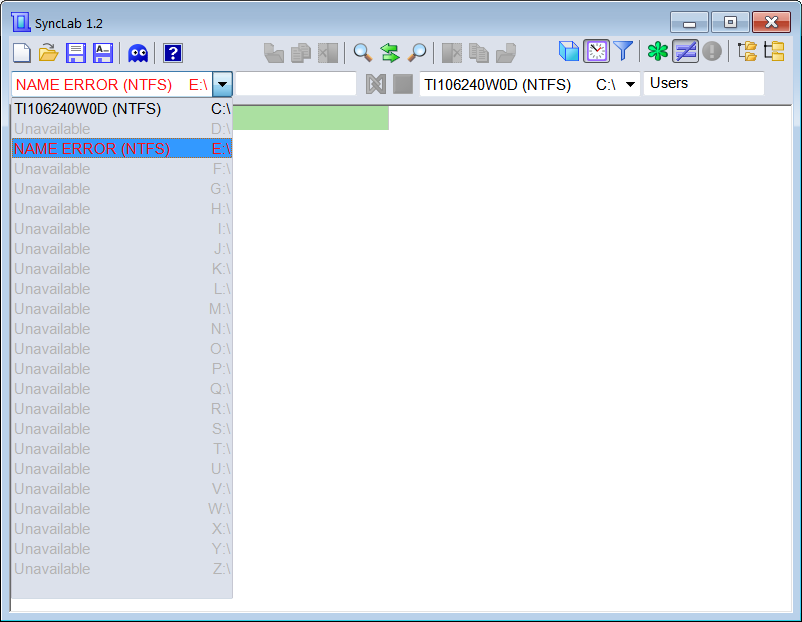
| If the drive is not in the list, you can select the last item (empty row) in the drop down list, and write the drive letter in the textbox for the path as shown below. Si la unidad no está en lista, usted puede seleccionar el último renglón (renglón vacio) en la lista desplegable, y escribir la letra de la unidad en la caja de texto para la ruta como se muestra debajo. |

| Step B |
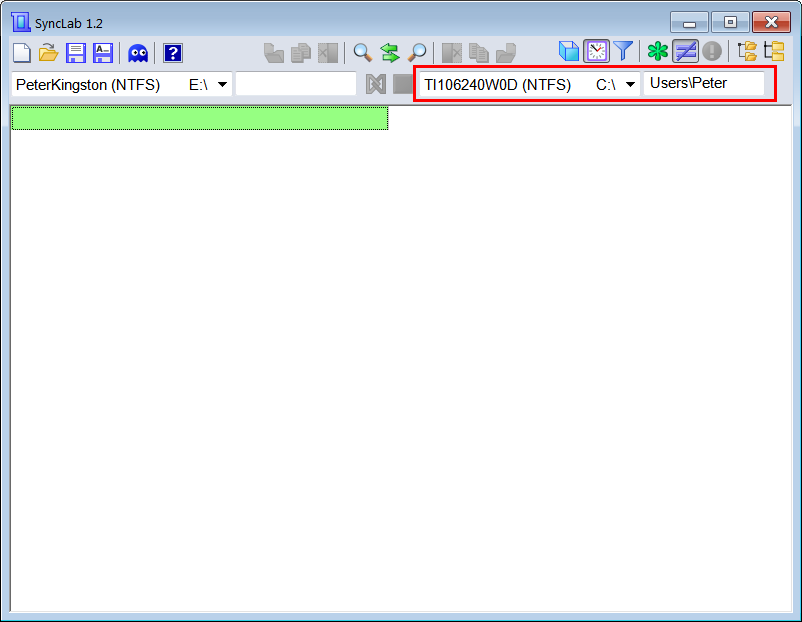
| Set the location on the right side as shown by clicking on the drop down list and typing the correct location in the textbox. If the drive is not in the list, you can select the last item (empty row) in the drop down list and write the drive letter in the path. Fije la ubicación en el lado de la derecha como se muestra haciendo clic en la lista desplegable y escribiendo la ruta correcta en la caja de texto. Si la unidad no está en la lista, usted puede seleccionar el último renglón (renglón vacio) en la lista desplegable y escribir el nombre de la unidad en la ruta. |
| Step C |
| Be sure that both drives have the same system files, if one of the drives is not NTFS, you must format the respective drive so that both drives are NTFS. Formatting erases all data in the drive, be sure to backup your files before formatting a drive. Asegúrese que ambas unidades tengan el mismo sistema de archivos, si una de la unidades no está en NTFS, usted debe formatear la unidad respectiva para que ambas unidades sean NTFS. El proceso de formatear borra todos los datos de la unidad, asegúrese de respaldar sus archivos antes de formatear una unidad. |
| Step D |
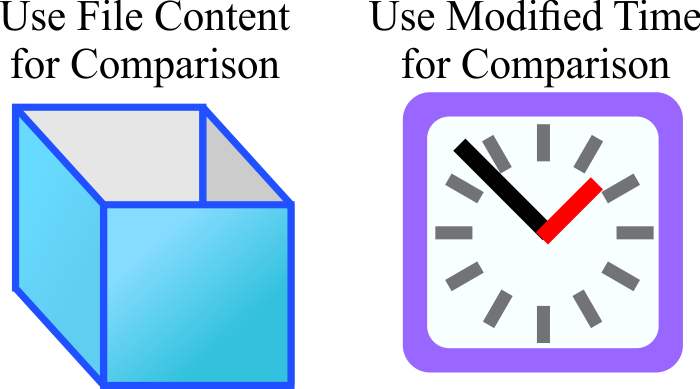
| If the clock in your computers are correct most of the time, leave the option "Use Modified Time for Comparison", otherwise select "Use File Content for Comparison". Si el reloj en sus computadoras tiene la hora correcta la mayoría del tiempo, deje la opción "Use Modified Time for Comparison", de otra forma seleccione "Use File Content for Comparison". |
| Step E |
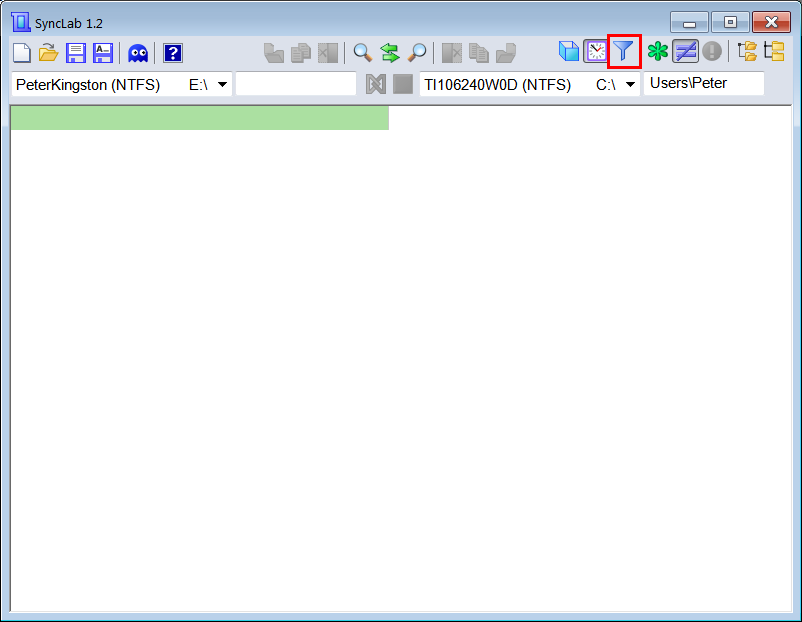
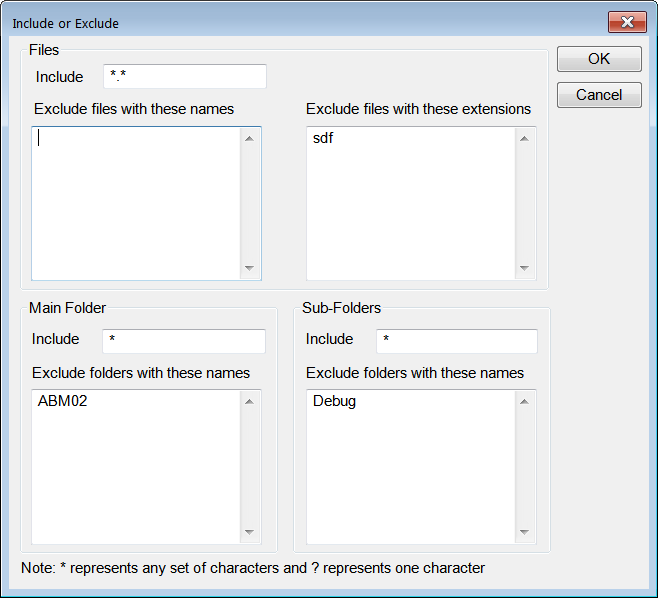
| The C:\User\Peter folder has four main folders: 110, ABF03, ABM02 and ABP01. Suppose you do not want to synchronize the ABM02 folder. Suppose also that you do not want to include any file with the extension "sdf". Additionally suppose that you do not want to include any folder named Debug. Click the Filter icon at the top and fill the Include or Exclude dialog as shown. La carpeta C:\User\Peter tiene cuatro carpetas principales: 110, ABF03, ABM02 and ABP01. Suponga que usted no quiere sincronizar la carpeta ABM02. Suponga también que usted no quiere incluir ningún archivo con la extensión "sdf". Adicionalmente suponga que usted no quiere incluir ningún folder llamado Debug. Haga clic en el icono de Filter en la parte superior y llene la información en el diálogo de Include or Exclude como se muestra. |
| Step F |
| Press the Save button and set the name to PeterBackup as shown. This file will be used to synchronize the devices in the future, be sure to remember where it has been saved. For instance, you can save it at C:\User\Peter. Presione el botón de Save y fije el nombre a PeterBackup como se muestra. Este archivo se usará para sincronizar los dispositivos en el futuro, asegúrese de recordar dónde se ha guardado este. Por ejemplo, usted puede guardarlo en C:\User\Peter. |

| Problem 2 |
| Create a preview of the synchronization. The preview includes files and folders that are different. Sync Lab will displayed: the file name, the last time the file was modified and the file size. Cree una vista previa de la sincronización. La vista previa incluye los archivos y las carpetas que son diferentes. Sync Lab mostrará: el nombre del archivo, la última vez que el archivo se modificó y el tamaño del archivo. |
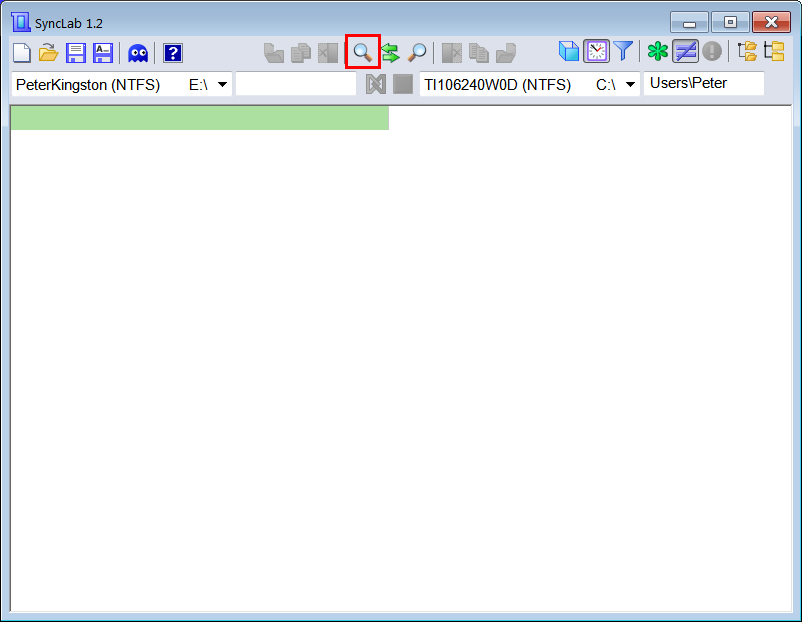
| Step A |
| Press the button "Display Changes to Make Left Side Equal to Right Side" as shown. After some time, the preview will be displayed. Presione el botón de "Display Changes to Make Left Side Equal to Right Side" como se muestra. Después de un tiempo, se mostrará la vista previa. |

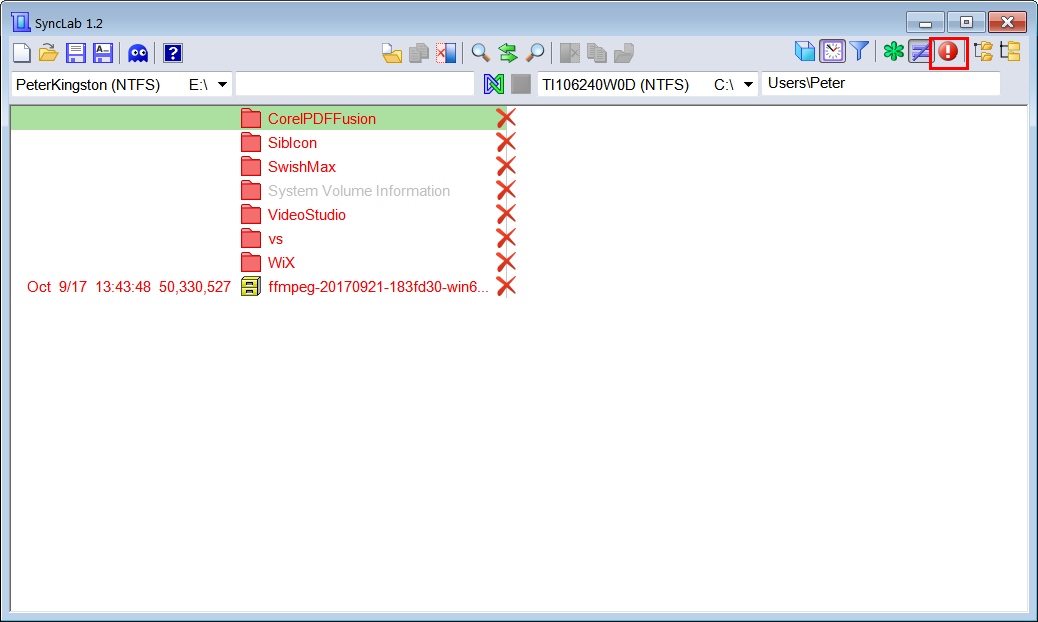
| Step B |
| Review carefully the preview. If the synchronization will delete files or overwrite new files with old ones, the file and folder will be displayed in red and the Warning icon will be displayed at the top. Revise con cuidado la vista previa. Si la sincronización borrará archivo o sobre escribirá archivos nuevos con viejos, el archivo y la carpeta se mostrarán en rojo y el icono de Warning se mostrará en la parte de arriba. |
| Tip |
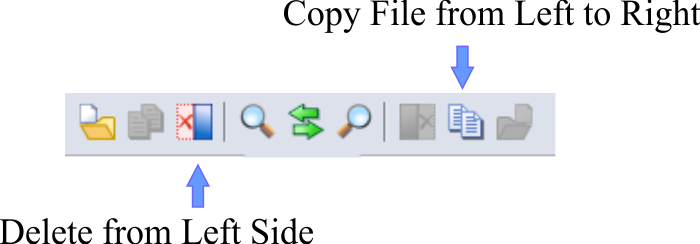
| If you have any conflicts that you would like to solve before the synchronization, you can solve them by using the options shown below. You can also exclude files (or folders) using the Ghost icon. NEVER synchronize two storage devices without carefully reviewing the preview because you can lose files. Si usted tiene algún conflicto que le gustaría resolver antes de sincronizar, usted puede resolverlos usando las opciones mostradas debajo. Usted puede también excluir archivos (o carpetas) usando el icono del Fantasma. NUNCA sincronice dos dispositivos de almacenamiento sin revisar cuidadosamente la vista previa porque que es posible perder archivos. |
| Tip |
| It is strongly recommended that you use a test folder for playing with Sync Lab before working with a real folder until you have understood how the synchronization works. SyncLab IS PROVIDED "AS IS" WITHOUT WARRANTY OF ANY KIND, EITHER EXPRESSED OR IMPLIED, INCLUDING BUT NOT LIMITED TO THE IMPLIED WARRANTIES OF MERCHANTABILITY AND/OR FITNESS FOR A PARTICULAR PURPOSE. I ACCEPT NO LIABILITY FOR ANY DAMAGE OR LOSS OF BUSINESS THAT THIS SOFTWARE MAY CAUSE. Se le recomienda mucho que usted use una carpeta de prueba para probar Sync Lab antes de usar una carpeta real hasta que usted haya entendido como la sincronización opera. Sync Lab SE PROPORCIONA "COMO ES" SIN NINGUNA GARANTÍA DE NINGÚN TIPO, YA SEA EXPRESADA O IMPLICADA, INCLUYENDO PERO SIN LIMITARSE A LAS GARANTÍAS IMPLICITAS DE VENTAS Y/O ADAPTACIÓN PARA UN PROPÓSITO PARTICULAR. YO NO ACEPTO NINGÚN RESPONSABILIDAD POR CUALQUIER DAÑ:O O PÉRDIDA DE NEGOCIOS QUE ESTE SOFTWARE PUEDA CAUSAR. |
| Problem 3 |
| Synchronize the devices by pressing the Synchronize button. Sincronice los dispositivos presionando el botón de Syncronize. |